What its about:
I wondered how to use unicode symbols in Blender e.g. ♳☀︎☺︎☤ ... to create 3D Objects from them that later on can be added to existing Models. This will help to reduces the amount of time spent on recreating of thought through iconography.Motivation:
I know it's some sort of overkill to use blender as a tool for modelling things for 3D-Printing. But the build in tools to automate certain tasks, as well as good support in importing all kinds of formats made me choose Blender ... and essentially write off some Tutorials and Findings on my way.My final task is to mark every 3D-Model that I'm going to print with a sign that indicates the plastic-type the print is made of, in order to help sorting and recycling of mis-printed or not-of-use things.
Plastic types are internationally marked with these symbols:
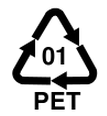
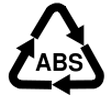
Fonts, Icons, Unicode, Vector-Graphics
This Tutorial will cover importing and handling of Symbols from Fonts - but you can use most of the hints for SVG / AI / Inkskape files as well.Fonttypes, Font-Icons and Unicode-Characters are scalable, image-like graphical items. While Vector-Graphics such as SVG-Graphics can have multiple layers and can have other attributes like transparency or color, Fonts, Font-Icons and Unicode-Characters are basically all of the same kind and be monochromatic. These Symbols can be used in writing Texts once you have a font installed or delivered along with the text. Lots of fonts are available free of charge, but your Operating System provides quite some right away.
Blender and Fonts
You might have already used the Texttool in Blender and with extrusion of Texts, 3D Objects can be created quite easily. Adding the right font or knowing where to find the special characters or fonticons is basically the rest of the tutorial.I try to describe the usage of these symbols on the example of a PET-Recycling Symbol.
In this example I like to work with this unicode symbol that I want to „emboss“ into an object: ♳
Finding the right symbol
- google by looking for „unicode symbol PET"
- browsing the special character table on your computer
- copy your unicode character of choice to the clipboard
- create a text-object in blender
- select a font:
if you want to keep the text editable, and you wnat to share your blender file you might want to provide the used font along with your file, so using a system font helps to share your file within same OS-Family/Version - in 3D-View menu
- —> Edit —> Text select „Paste Clipboard"
Troubleshooting
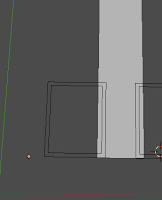
Lucky you :) if you see your copied symbol...However if instead of your unicode symbol you see nothing or a square thingy, the font you have selected does not support your symbol - in this case check another font...
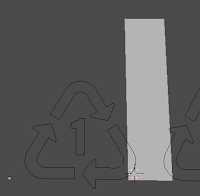
Extrude and adjust bevel
Since the Extrusion and styling is applied by using text/font-properties the text is still editable.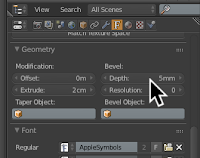

Only you cannot execute boolean operations on this object e.g. to combine it with other objects - for that turn your extruded chars into a mesh:
- Select the text-object then ALT+C
Ressources
-
The Font containing the OS-Icons
from „zocial“-Font from http://weloveiconfonts.com/


Now - GO - Create!
Oh and now back to the beginning of the Tutorial the ♳ symbol. 3D Printers use resin or plastic filament, but since their main purpose is prototyping - a many iterations will just create plastic waste. But there are helpful tools to bring sorted ressources back into the printing process.For my part I decided to mark all my 3D printings, telling the material they are made from, so eventually the waste can be reused:
♳ PET ♴ PE-HD ♵ PVC ♶ PE-LD ♷ PP ♸ PS ♹ o(ther) ♹ ABS ♹ PLA ♺ ?
I like to encourage you to do this as well. And if its not for the sake of planned recycling at least it looks bad-ass professional :D
Tools and ressources used in this tutorial
- Blender v2.72 on MacOS
- Evernote & Sublime to collect ressources and write together this tutorial.


